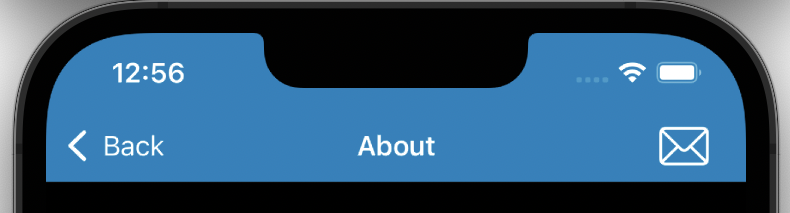
Coloring the Navigation Bar in an iOS app (including the sides of the tab) requires setting an appearance attribute within the init method. It actually only requires a few lines of code, but is a bit unintuitive.
The final line is for setting the text color of the back button. The color of the navigationBarItems can be set by directly setting the foreground color of the Images.
Android has been locking down the security within chrome, making cross-origin requests far more complicated within cordova applications. As a result a good alternative to use is a native plugin such as the @ionic-native/http or cordova-plugin-advanced-http. Unfortunately, this gives you a method that is dependent upon callbacks rather than one that can be used asynchronously.
The good news is that you can fix this by wrapping the method in a promise as show below.
A little over a month ago Daring Fireball linked to a new monospaced font with support for coding optimized ligatures. I was already using a JetBrains IDE for my primary development at work so I decided to give it a try, and one month in I am really liking it.
Some of the ligatures such as => are purely cosmetic changes, but others such as the greater or equal symbol and the less than or equal to symbol are much easier to read. The font has been designed with care to the point where even differentiating between === and == is easier with ligatures enabled. The only symbol I am not yet sold on is the one for != which is easy enough to read, but so different from how it is typed that it slows me occasionally.
Overall I finding viewing my code through these ligatures to be an improvement, and plan to keep on using them in any development environment where they are supported.
As a developer, a lot of time is spent continuously refreshing a web page. This can be made faster by using a keyboard shortcut, for most browsers refreshing is done by the F5 key. However, despite repeated requests Google has still not built in this functionality to the Mac OS version of Chrome. Fortunately there is another way to add this feature.
First open up “System Preferences”
Select “Keyboard” and then the “Shortcuts” tab
On the left panel select “App Shortcuts”
Then press the “+” button below the white boxes
From the application dropdown select “Google Chrome”
For the Menu Title enter “Reload This Page” (This text must be exact)
In the Keyboard Shortcut field hit the F5 key
It is a bit of a work-around, but this adds the ability to use the F5 key to refresh a webpage when using Chrome on the Mac.
Two years ago I wrote a site to rank NCAA hockey teams. The Elo based rankings have been publicly available for a while now, but in addition I ended up writing a bit of an API that has technically been released, but never publicized.
The url ebscer.com/collegehockey/api/<season>.json will return a json formatted data dump representing all games in a given season. Each game lists the date, home team, away team, home score, and away score for each game. For example all games in the current season are listed at ebscer.com/collegehockey/api/2016-2017.json Data goes all the way back to the 1998-1999 season.
I am happy to let anyone use this data, and just ask that you be respectful of the servers.
Last month I noted that Swift 2 had not yet dropped its Objective-C origins when it came to retrieving website text. Fortunately, Swift 3 has great advances in this area. Getting source of a webpage is now a simple and straightforwards process…
let url:NSURL = NSURL(string: "http://ebscer.com")!
do
{
    let responseText:String = try String(contentsOf:url,
                            encoding:String.Encoding.utf8)
}
catch let error
{
    print("Error: \(error)")
}
Loading the text of a webpage in Swift has not completely dropped its Objective-C origins, which makes the process a little bit less obvious than it should be. Fortunately it is only a few lines…
let url:NSURL = NSURL(string: "http://ebscer.com")!
let request:NSURLRequest = NSURLRequest(URL: url)
NSURLConnection.sendAsynchronousRequest(request,
    queue: NSOperationQueue(),
    completionHandler: { (response:NSURLResponse?,
        data: NSData? error: NSError?) -> Void in
            let responseText:String = String(data: data!,
                encoding: NSUTF8StringEncoding)!
            print(responseText)
    })
When asking a question in an app, it is important to make it easy for the user to find the right answer to the question. Simply because a question is phrased for a yes/no answer doesn’t mean that presenting yes or no as answers is a good idea. Instead it is a good idea to present the answers such that the right option can be selected even if the user doesn’t even bother to read the question.
The Brexit ballot from earlier this month is an example of good design. The question on the ballet asked if the UK should leave the EU, but the answers to pick from are ‘remain’ and ‘leave’ rather than ‘yes’ and ‘no’. This makes for a better user experience.
The image to the right is from the Stuff I Need app and shows the example of the same design. ‘Delete All’ and ‘Cancel’ do not explicitly answer the question, but give the user the opportunity to pick the right choice, even if they don’t read the question.
By default the finder on Mac OSX does not show the full file path of the current folder. This can make it hard to remember where a folder is, and can cause confusion when working with multiple folders with the same name.
Fortunately, there is a simple fix that will show the full file path in the finder’s title bar.
By default Windows will download and install updates on your computer without any required interaction. This is great, but the problem is that it will also reboot on its own, closing anything you may have been in the middle of working on. No idea why Microsoft approved of this terrible user experience, but fortunately there is a (very hidden) way of preventing it from happening.
First from the start menu, search and open “gpedit.msc”. Then in the application go to Computer Configuration -> Administrative Templates -> Windows Components -> Windows Update. Then select the option “No auto-restart with logged on users for scheduled automatic updates installations”, then click “Enable”, and then “Apply”.
This will ensure that your Windows 10 machine will only restart when you want it to.
In general Android does not want developers creating alert dialogs that block the flow of code, but for those situations where it is needed, there is a way to force a dialog to wait. The approach essentially uses a handler to create a slightly more elegant version of a busy loop.
private boolean resultValue;
public boolean getDialogValueBack(Context context)
{
    final Handler handler = new Handler()
    {
        @Override
        public void handleMessage(Message mesg)
        {
            throw new RuntimeException();
        }
    };

    AlertDialog.Builder alert = new AlertDialog.Builder(context);
    alert.setTitle("Title");
    alert.setMessage("Message");
    alert.setPositiveButton("Return True", new DialogInterface.OnClickListener()
    {
        public void onClick(DialogInterface dialog, int id)
        {
            resultValue = true;
            handler.sendMessage(handler.obtainMessage());
        }
    });
    alert.setNegativeButton("Return False", new DialogInterface.OnClickListener()
    {
        public void onClick(DialogInterface dialog, int id)
        {
            resultValue = false;
            handler.sendMessage(handler.obtainMessage());
        }
    });
    alert.show();

    try{ Looper.loop(); }
    catch(RuntimeException e){}

    return resultValue;
}
After spending a lot of time with the unix command line you can get used to simply using the ls command to list the files in the current directory, it can be annoying when the option is suddenly not there on the Windows. Using the cd command to traverse through directories is the same, so it is a bit jarring when suddenly ls does not work.
Fortunately I was able to find a simple way to fix this from Stack Overflow. This approach maps the ls command to the dir, and is so simple that the file to do so can be created with a single statement on the command line.
echo dir %1 > %systemroot%\system32\ls.bat
This statement will create a new bat file that is always visible and will replace ls with dir behind the scenes. Now you can just use the ls command without having to think about what operating system you are running.
While writing to a file is easy in C# applications, for apps written in JavaScript things are a bit more complicated. Especially if you want to write to a file outside of the app’s sandbox. Fortunately this can be solved using Microsoft’s WinJS libraries.
var exportData = "String of data";
var savePicker = new Windows.Storage.Pickers.FileSavePicker();
savePicker.suggestedStartLocation = Windows.Storage.Pickers.PickerLocationId.documentsLibrary;
savePicker.fileTypeChoices.insert("CSV", [".csv"]);
savePicker.suggestedFileName = "Export.csv";

savePicker.pickSaveFileAsync().then(function (file) {
    if (file) {
        Windows.Storage.CachedFileManager.deferUpdates(file);
        Windows.Storage.FileIO.writeTextAsync(file, exportData).done(function () {
            Windows.Storage.CachedFileManager.completeUpdatesAsync(file).done(function (updateStatus) {
                if (updateStatus === Windows.Storage.Provider.FileUpdateStatus.complete) {
                    //file saved
                } else {
                   //file not saved, failed for some reason
                }
            });
        });
    } else {
        //file not saved, canceled by user
    }
});
This will allow Cordova apps to write out to a part of the operating system where users can easily access the files.
I recently had the opportunity to review a number of angular.js compatible UI frameworks. All of these frameworks are fairly new, and therefore they all give some thought to how they appear on phones and tablets.
Angular Material has been created by Google to follow the guidelines for Android’s Material UI. In my opinion this is the best UI for angular. Given its ties to Android it works great on mobile, but it also is designed to scale up to also look good on larger screens. Additionally, the flex box based layout system for Angular Material is more complete and more reliable than what is offered by the other frameworks.
The Ionic framework by Drifty is a mobile focused UI that I have used before. Ionic has good looking controls, and mostly follows the design found in iOS 7. Compared to the other frameworks, the touch targets for Ionic are larger and better optimized for phones. By design, Ionic is meant to be used for creating Cordova apps, but can also be used for websites if you copy twofiles from their github.
Unlike the other frameworks, Bootstrap does not include any JavaScript and is implemented strictly through css. While this lightweight approach is great, UI Bootstrap is also the least optimized for mobile and is the least integrated with angular.
Created by LumApps, Lumx is another framework that follows Android’s Material design guidelines. Unfortunately, when compared to Angular Material, it is not quite as good. Also LumX has the far more third party dependencies than the other frameworks, making it more difficult for set up. On the plus side, it has the best selection of built in colors for theming your app.
Using multiple frameworks
Additionally there is the option to use a number of these frameworks together at the same time. This is not always an option as the css for Bootstrap and Ionic conflict with one another. But sometimes it can work. In particular the components of Ionic make a good compliment to the layout and navigation of Material.
On newer versions of Android (such as Lollipop and Marshmallow) the activity indicator now has a distinct color instead of just being a shade of gray. While this is neat, it brings up the potential for the color of the activity indicator to clash with your design.
Fortunately it is possible to change the color of these controls. Starting with the xml in the layout, your progress bar will look as follows…
The relevant part of this code is the setting of progressDrawable to a custom drawable object. While this custom object must exist, it doesn’t actually have to do anything. The full source of colorProgress.xml is below and is essentially blank.
Finally we will get to the Java code that actually sets the color of the progress bar. This is done as the program starts up and consists of three steps. First, you filter out the older Android OS versions to avoid crashing the app on Android 4.x phones. Next you get a reference to the ProgressBar object, and then finally you set the object to the color you want.
protected void onCreate(Bundle savedInstanceState)
{
super.onCreate(savedInstanceState);
setContentView(R.layout.activity_main);
if (android.os.Build.VERSION.SDK_INT >= Build.VERSION_CODES.LOLLIPOP)
{
ProgressBar progressbar = (ProgressBar) findViewById(R.id.activityIndicator);
int color = 0xFF2980b9;
progressbar.getIndeterminateDrawable().setColorFilter(color, PorterDuff.Mode.SRC_IN);
progressbar.getProgressDrawable().setColorFilter(color, PorterDuff.Mode.SRC_IN);
}
}